Sentinel Playbook: Device Isolation Using MDE API (Part 1 - API Setup)
Recently, I was browsing the sub-Reddit of Defender ATP and came across a post asking about using Sentinel Playbook to Isolate Multiple Devices that are part of a specific MDE Tag/Group. This intrigued me, as many people might initially try to use Advanced Hunting (Custom Detection Rule) for this task. However, data about MDE device tags or groups is often incomplete or inconsistent in Advanced Hunting—this data is more reliably accessible through the MDE API.
Here is the flow:
graph LR;
  trigger["Trigger<br>(Manual or Incident)"] --> api["GET Machine List<br>MachineID by Tag/Group"] --> api2["POST Isolate Machine<br>Isolate all MachineID"]
This guide is part one of a proof of concept, that will show you how to Isolate Device with Sentinel Playbook (Logic Apps) and data from MDE API. It will help you with the following scenario:
- You want to bulk Isolate or Unisolate Device, targeting specific parameter, such as Device Tag/Group.
- You want an automation flow to Isolate or Unisolate Device using API.
What You’ll learn in this part one:
- How to use Microsoft Defender API
- How to register an Azure App and get API access
- How to securely store secrets in Azure Key Vault
- How to test and validate your API token before building a Logic App
Scope & Requirements:
- Administrator access to create App Registration in Azure portal.
- Administrator access to create or modify Azure Key Vault.
- Based on Isolation feature and its limitation (such as OS).
- Isolate API limitation, such as 100 calls per minute or 1500 calls per hour.
Similar reference to this method is also available in this Github page.
Step 1: Creating API Application and the Required –Permission
Our first step to use API is to create an App with right permission, as a means of Authorization to access our MDE resources.
Info
If you are not familiar with MDE API, I highly suggest to get familiar with MDE API Hello World docs first.
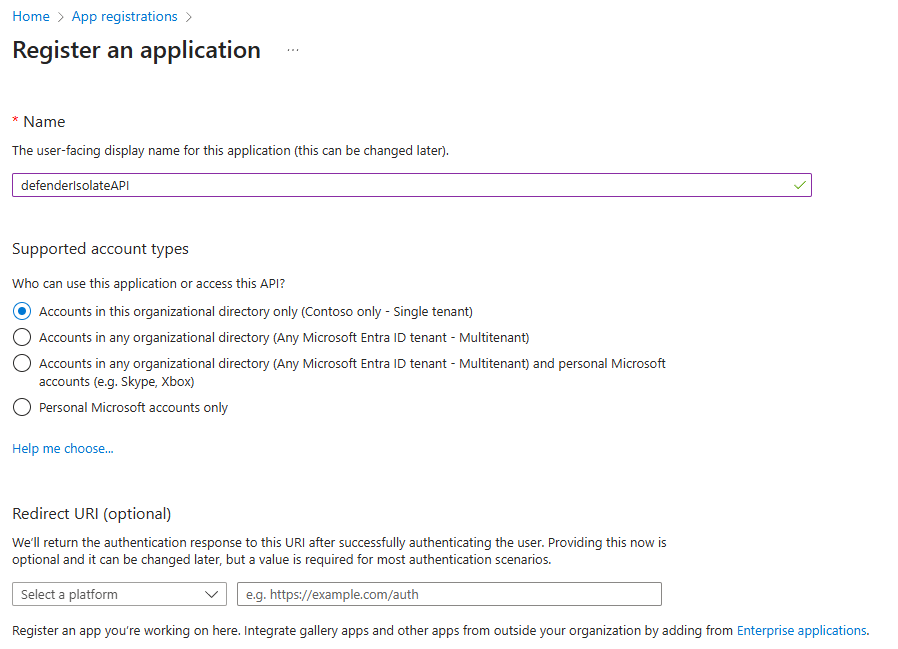
Go to Azure Portal > and search for App registration, and click fo New registration.
Fill up the name and click Register, we don’t need to modify other parameter.
On the left panel, click on Manage > API permissions blade.
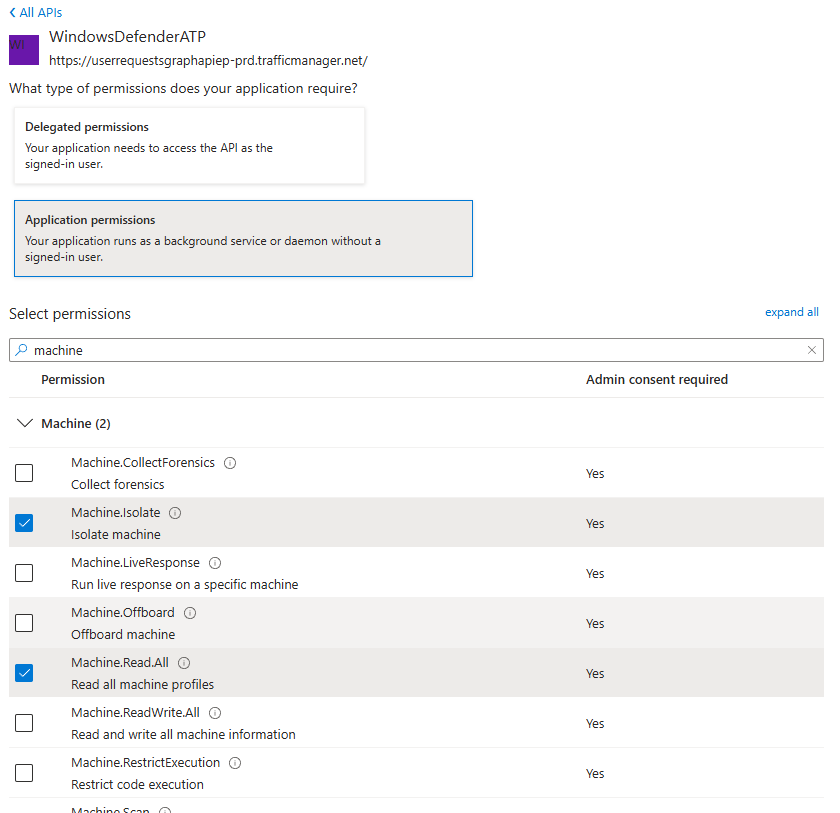
Click on Add a permission > APIs my organization uses > WindowsDefenderATP.

Select Application permissions > and tick Machine.Isolate and Machine.ReadAll
Info
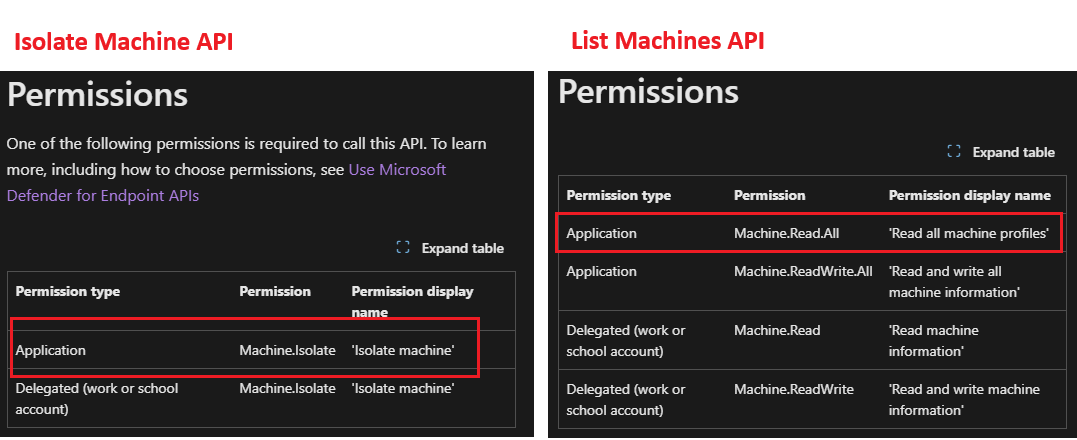
For targeted isolation, we need Machine.Isolate and Machine.ReadAll permissions, as per API documentation about Isolate Machine and List Machine.
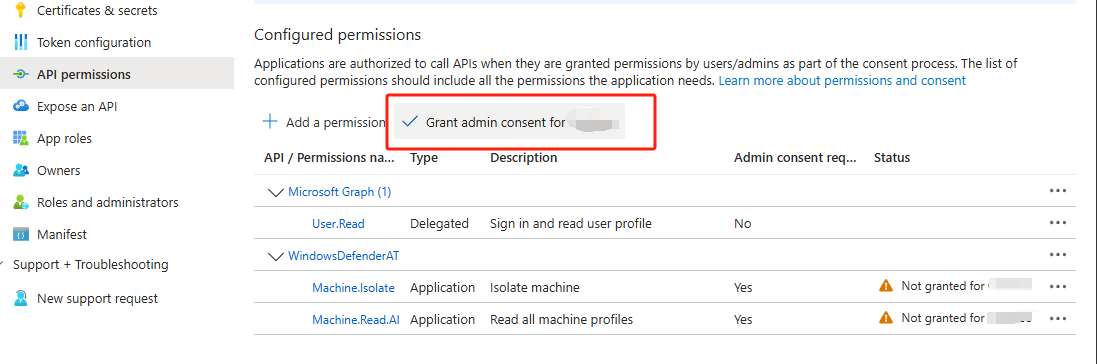
Once you add the permission, you will be back at API permissions blade, click Grant admin consent for xxx
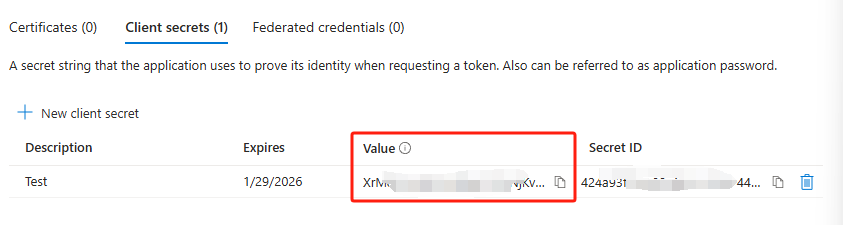
Go to Certificates & secrets blade and select New client secret. Put the description, and specify the secret validity. Click Add.
- You will get your secret value here, copy it somewhere safe, as you only have access to it once. If you lost it, you need to recreate this step. Also later in the step, we will need to retrieve this value.
Info
This secret will be acting like your password to access your API, whenever you wants to access MDE API, you or your application will need to present the secret value to authorize.
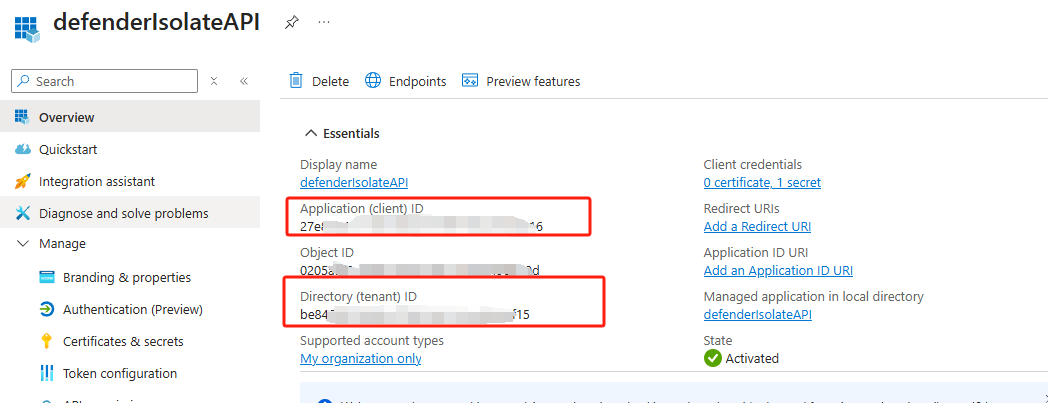
- Now, go to the Overview blade, and copy the value of Application (client) ID and Directory (tenant) ID.
Tip
Now you have 3 values that will be needed when making authorized API call. In most modern API platforms that use OAuth 2.0 (such as Microsoft, Google, Okta, and others), these values are essential for issuing an access token, which is then used to authenticate your API requests.
- Secret Value
- Application / Client ID
- Directory / Tenant ID
Step 2: Store the Secret in Azure Key Vault
We will be storing the secret in Azure Key Vault to securely protect them and only allow the required Azure’s service (Logic App that we will create later) to access them.
- From Azure Portal > search Key Vaults > Create a new Key Vault.
- For this testing purpose, we go with all default settings and create the Vault.
- Go to the Key Vault resource created, on left side click Access control (IAM) blade to give RBAC access to add the secrets.
- Click Add > Add role assignment. For this test I will assign Key Vault Administrator, and add my own account as the member.
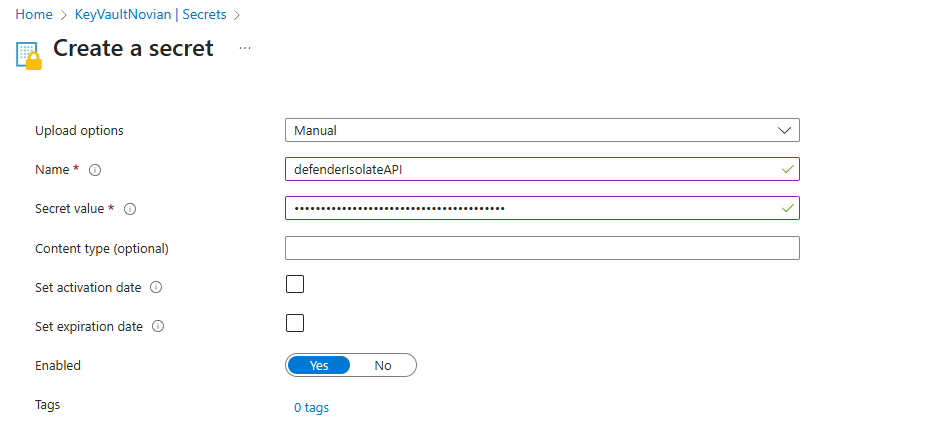
- Now, on the left panel go to Objects > Secrets blade. Then click Generate/Import.

- Input the Secret value that you have from the previous step here.
Info
In Production environment, you might want to limit the IAM to Key Vault Secrets Officer to only allow managing/adding the Secret value.
Reference - Azure built-in roles for Key Vault data plane operations
Optional: Testing the API call
If you want to test on how your API works, you can follow this section. Otherwise, if you are familiar with API already, you can skip this section.
First, download the following powershell script to get the token, and do the API call.
- Inside the Get-Token.ps1 you want to modify tenantId, appId and appSecret with the value you get from Step 1

- Open Powershell.exe and run the .\Get-Token.ps1
Info
If you encounter UnauthorizedAccess error, you can temporarily disable powershell Execution policy, this will only affect the current Powershell instance:
Set-ExecutionPolicy Bypass -Scope Process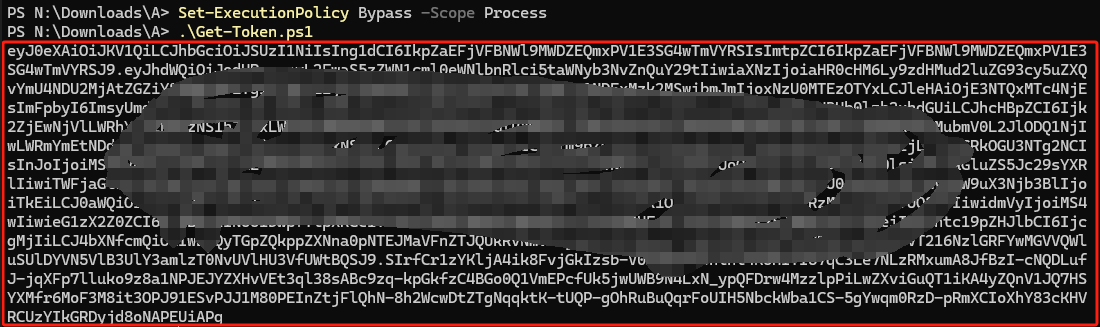
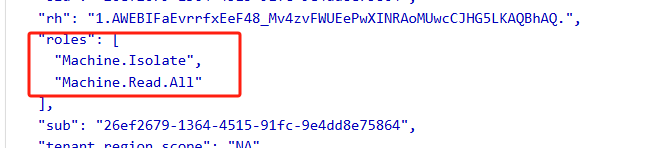
- Go to jwt.ms and paste the token above.
- You should see the roles we applied earlier. If you don’t see it, it means your Step 1 App registration permission is not applied. Try to redo Step 1.
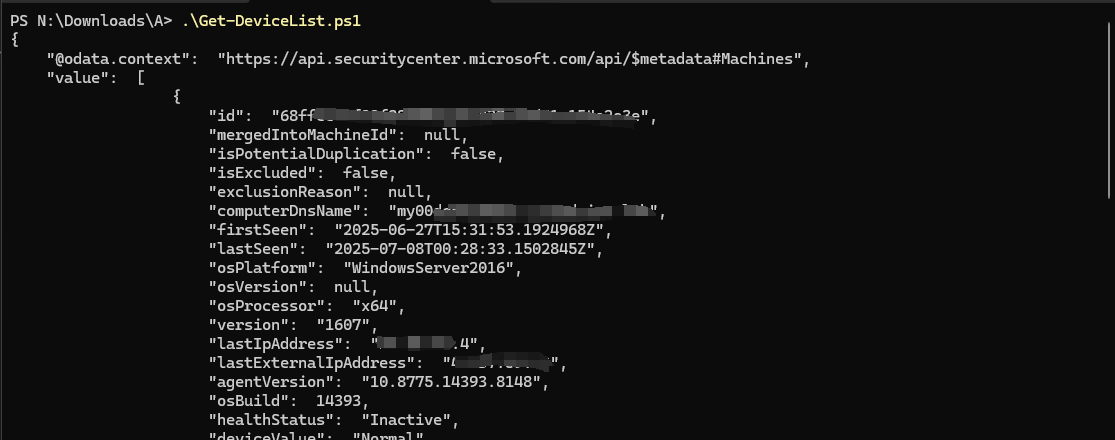
Next, we want to try and call the Get machine list API, to see the output of the API.
- Run Get-DeviceList.ps1, make sure both Get-Token.ps1 is also at the same folder.
- You should see the details of 1 machine in your MDE tenant. Including, machineTags or rbacGroupName (Device Group) which we will use in part 2, to target and filter these devices.
That’s pretty much how API works, without MDE portal and just using a script, you can now access data in your MDE tenant. In this example, you are accessing Devices data.
The more you get familiar with MDE API list, you will see many other datas you can obtain (GET), and even more, you can instruct a command (POST) through API. Which, we will leverage to instruct Device Isolation in part 2.
Wrapping Up: Laying Out API Foundation for Boundless Potential
You’ve now seen how the MDE API works and how to authorize access through Azure App Registration and Key Vault. While this setup alone may not seem powerful yet, it lays the essential groundwork for integrating with Sentinel Logic Apps.
With this foundation in place, you’re ready to start building playbooks that can automate bulk actions—like isolating devices based on tags or groups.
Next, in Part 2 we’ll be building the Logic App that ties this all together and makes targeted bulk Isolation possible.